Application Upload - Step-by-Step Guide
Use this guide to create and submit a new application in myPOS AppMarket. The upload flow is split into three tabs: Main Info, Details, and Custom Details.
Before You Start
Before opening the upload form, make sure you have the following assets ready:
- Your signed
.apkfile - App name and release information
- Short and long marketing descriptions
- Screenshots of the application
- Banner image
- App icon
- Privacy policy URL
- Any device or country restrictions you want to apply
Use a production-ready APK and verify that the package name, versioning, and permissions are correct before upload. The platform reads core technical details directly from the APK file.
Step 1: Open Add New App
- Sign in to AppMarket.
- Open the Apps section.
- Click Add New App.
- The form opens with three tabs:
- Main Info
- Details
- Custom Details
Step 2: Complete Main Info
The Main Info tab is where you define the technical package you want to submit.
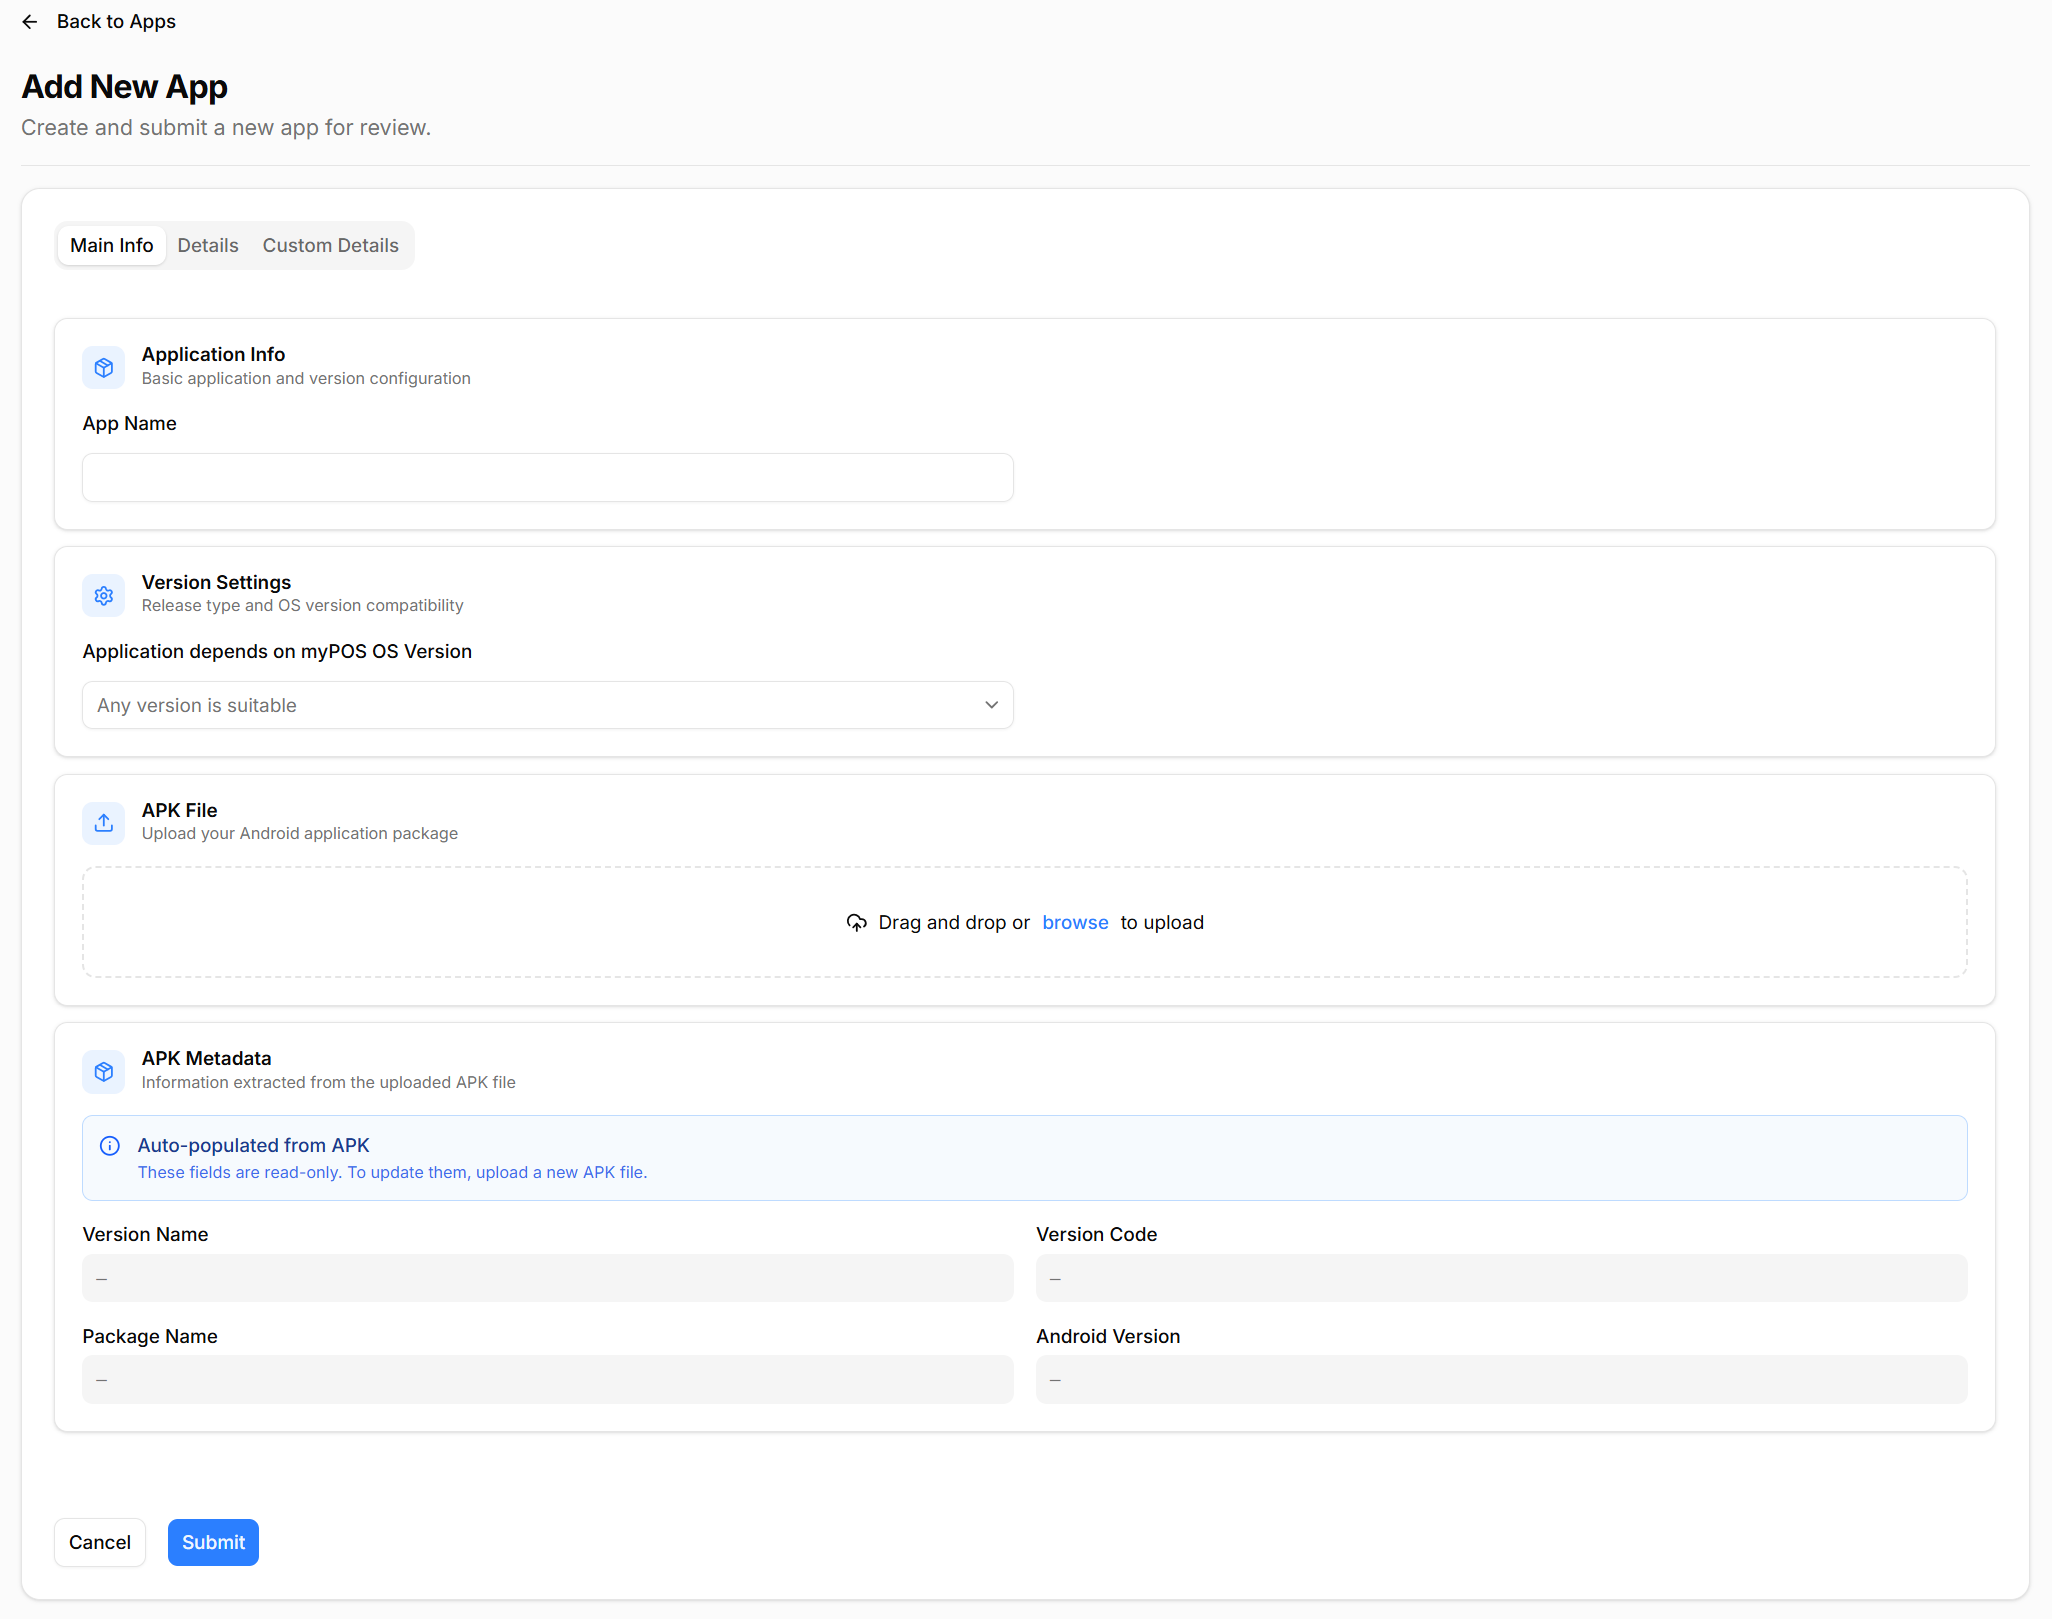
Fill in these fields:
- App Name: Enter the public name of the application.
- System App: Select Yes only if the application is intended to be treated as a system-level app.
- Critical Version: Mark this only when the release should be treated as critical.
- Application depends on myPOS OS Version: Choose the minimum OS version required by your application.
- Release Type: Select the intended release channel, for example Beta or Official Release.
Then upload the APK:
- Drag and drop the file or click browse.
- If needed, confirm that the uploaded APK is signed.
- After upload, AppMarket automatically reads and fills:
- Version Name
- Version Code
- Package Name
- Application depends on Android Version
- Permissions
If any auto-populated APK details are incorrect, do not continue with the same file. Build and upload a corrected APK instead.
Step 3: Complete Details
The Details tab contains the store listing content that users see in AppMarket.
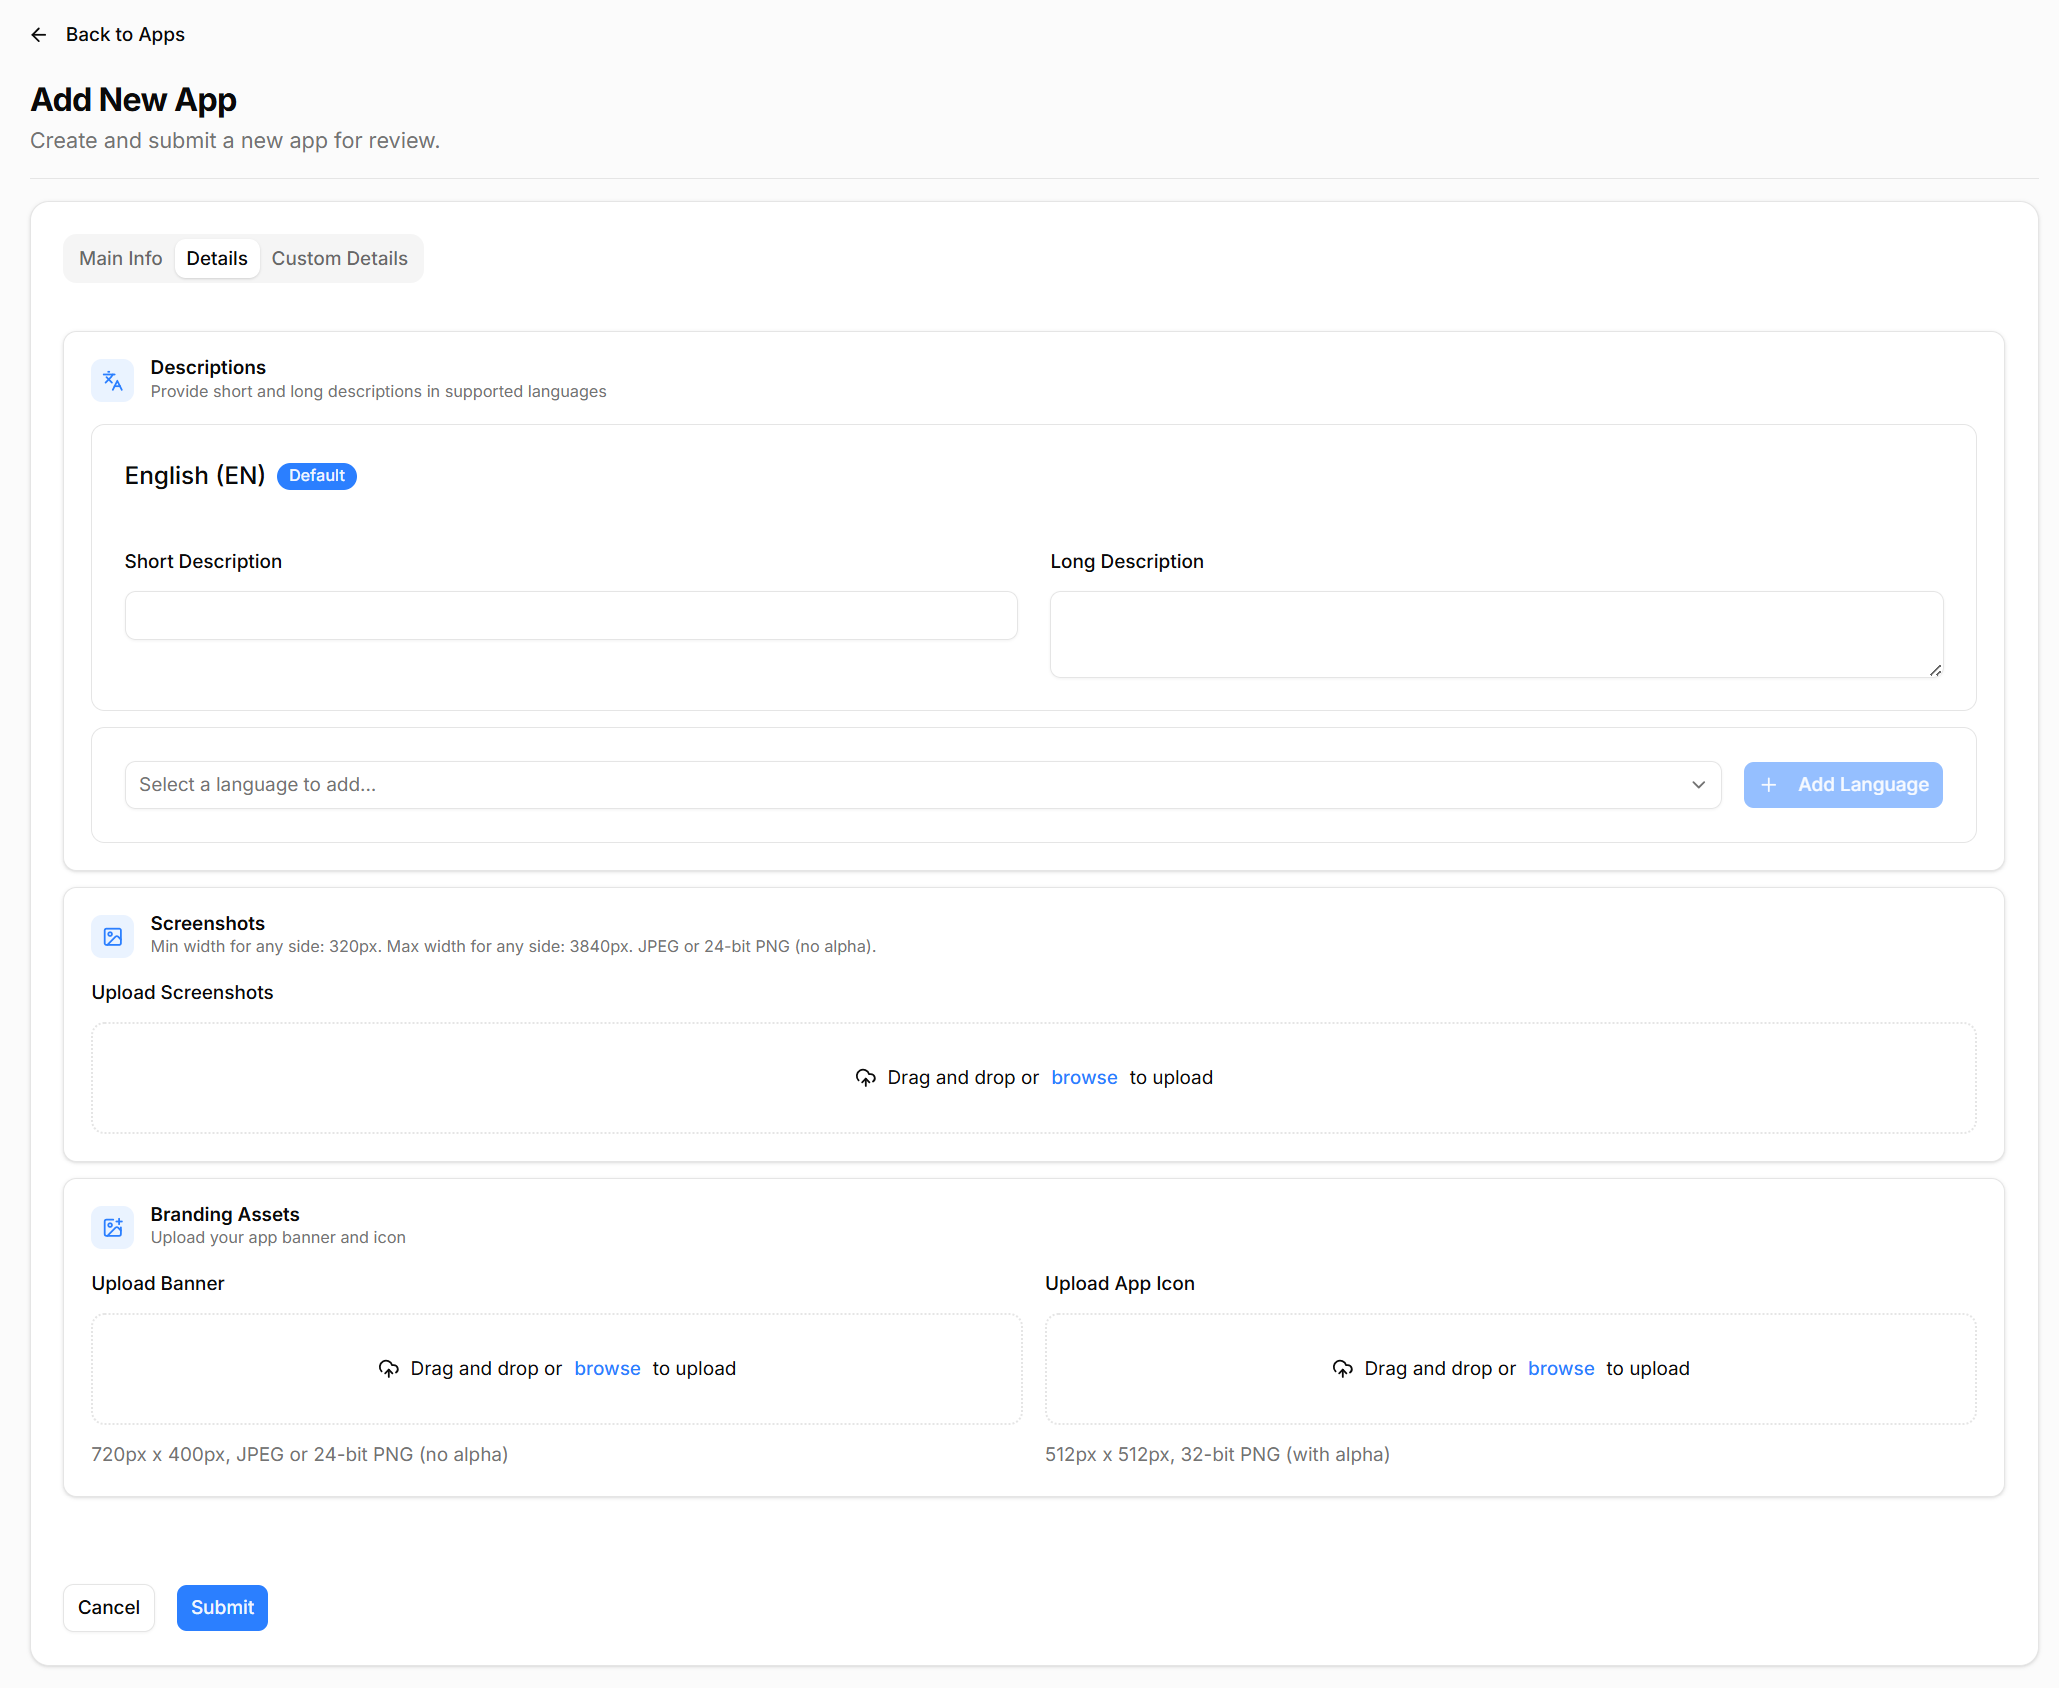
Configure the default language block first:
- Short Description: Add a concise summary of the app.
- Long Description: Add the full marketing description, features, and usage details.
If you want to localize the listing:
- Select an additional language from the language dropdown.
- Click Add Language.
- Enter translated short and long descriptions for that language.
Upload the required visual assets:
- Screenshots:
- Upload screenshots that show the application in use.
- Supported size range shown in the form: 320px minimum and 3840px maximum on any side.
- Supported formats shown in the form: JPEG or 24-bit PNG (no alpha).
- Banner:
- Required size: 720 x 400 px.
- Supported formats: JPEG or 24-bit PNG (no alpha).
- App Icon:
- Required size: 512 x 512 px.
- Supported format: 32-bit PNG with alpha.
Step 4: Complete Custom Details
The Custom Details tab controls publication and distribution settings.
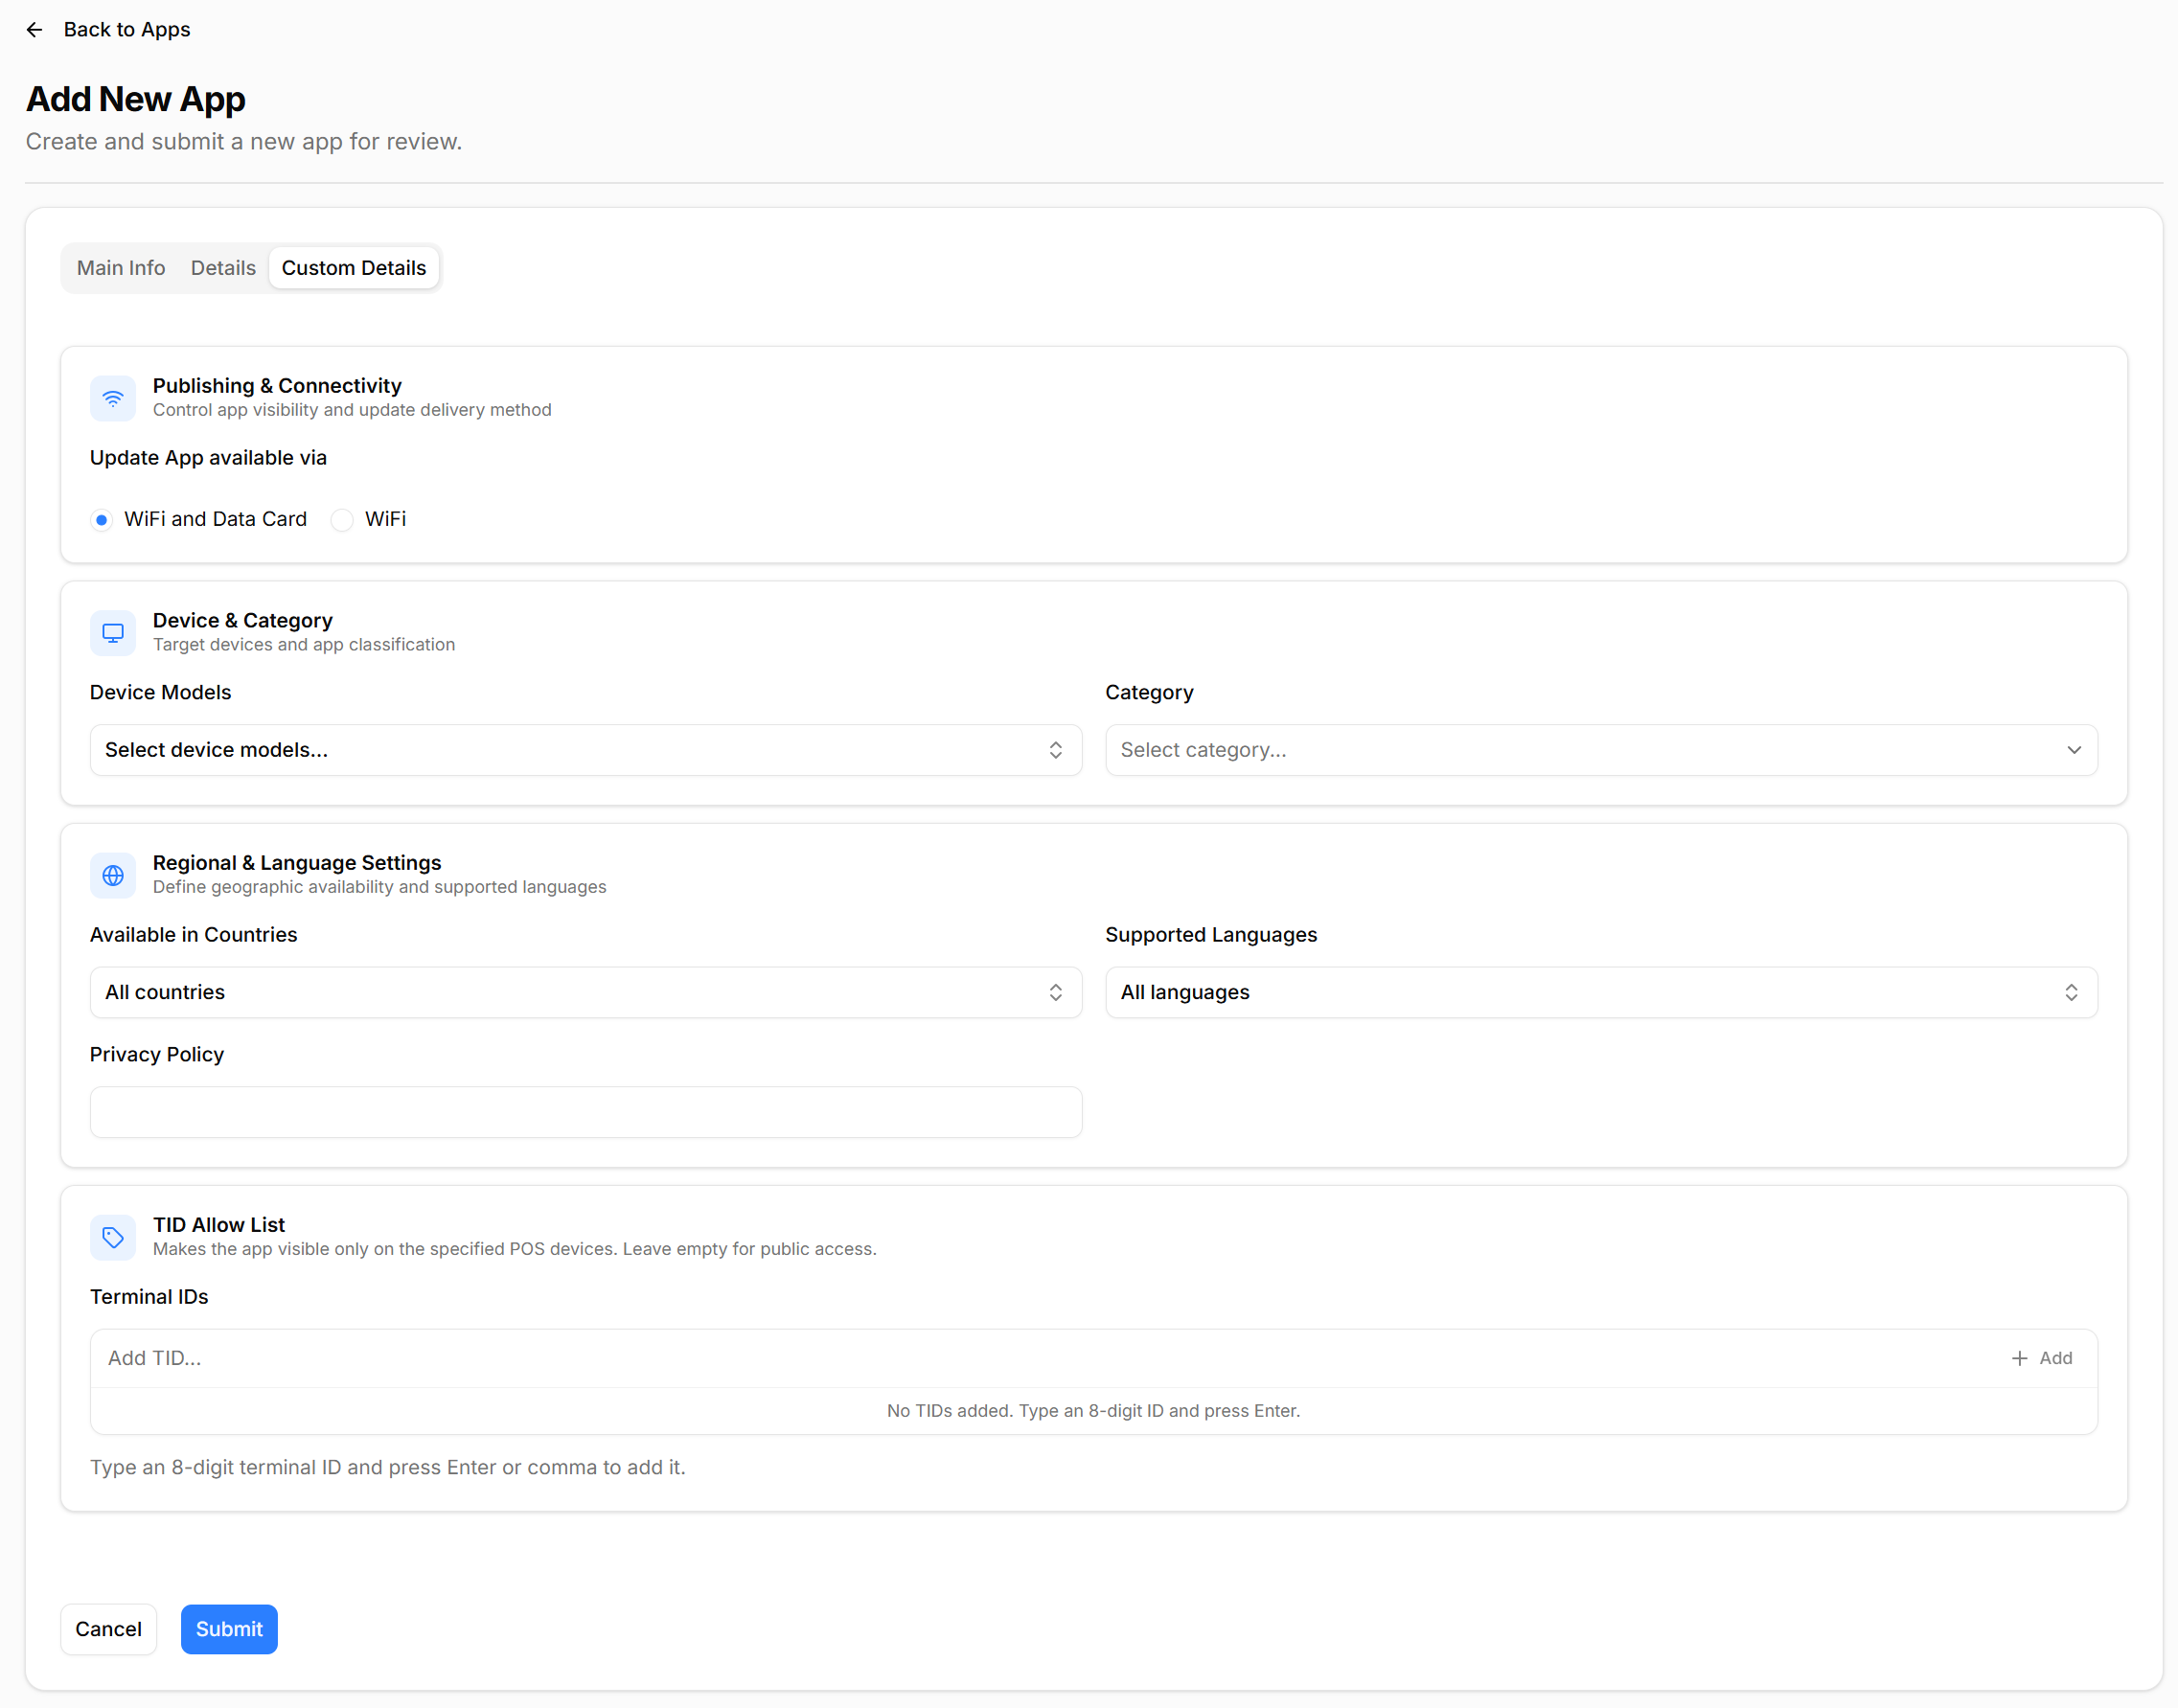
Review and complete the following:
- Publish to App Market:
- Select Yes to publish the app after approval.
- Select No if you want to keep publication for later.
- Update App available via:
- Choose how updates are delivered, such as WiFi and Data Card or WiFi only.
- Device Models:
- Review the supported target device models.
- Category:
- Select the most appropriate AppMarket category.
- Available in Countries:
- Define where the app will be available.
- Supported Languages:
- Select the languages supported by the application.
- Privacy Policy:
- Provide a valid privacy policy URL.
- TID Allow List:
- Add terminal IDs if the app should be visible only on specific POS devices.
- Leave this empty if the app should be publicly available according to the rest of the configured visibility rules.
The TID allow list is useful for controlled rollouts, pilots, or customer-specific deployments.
Step 5: Submit the App
After all three tabs are completed:
- Review all fields one final time.
- Click Submit.
- Wait for the application to enter the review flow.
After submission, the app goes through the AppMarket review process before publication.
Recommended Checklist
Use this checklist before you click Submit:
Track your AppMarket submission readiness:
0/8If the form rejects your upload or displays a validation message, correct the affected field or asset first and then try again. For AppMarket-specific help, contact integrations@mypos.com.